Since green is such a big part of St. Patty's Day I decided to come up with a project that is green in both concept and color. Making this wreath was an easy NO-cost project using only items that I had around the house. For this project I up-cycled a cardboard box, a hand-me-down top, and a few ribbons I had laying around.
I started with an empty cardboard box.
Using a large dinner plate for the outside and a salad plate for the inside, I cut out three rings.
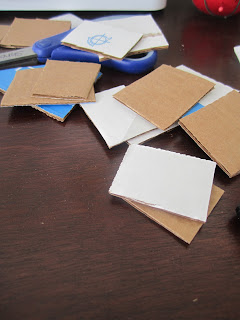
I then cut out 24 1.5 X 1.5 inch squares with the rest of the cardboard.
On the bottom ring I glue-gunned the squares 3 pieces high at the 12,3,6 & 9 'o'clock positions, then glued the second ring on top and repeated the process.
Behold, the wreath frame.
From there, I took the hand-me-down shirt that didn't quite fit but I LOVED the color. It had a lot of material to use so I used my fabric shears and cut it down to large usable pieces.
And then gathered the edges around the frame, securing with a staple gun.
From there, the possibilities were pretty endless when it came to what I wanted to place on the wreath.
My first inclination was to take the remaining material, braid it, and sew it into a small brooch-like attachment. I added a little glitter spritz to it and this is how it turned out:
While I liked that option, I wanted something a little more simple and rustic looking. Our door is also pretty tall so I wanted something that broke up the length and was noticeable from the street. So, I found a bunch of green ribbon in my craft closet and simply tied it around the form. Easy, right?
Viola!
The wreath form was such a simple thing to put together and for the price, I think I'll be using it for as many holidays as possible!


No comments:
Post a Comment